Deploying your Laravel project on Heroku
Easy steps

I am a developer from Nigeria. I enjoy connecting with and learning from other developers like me.
As developers, there are times when we might need to take our projects from localhost to live deployment. But what if it's a test project or a project you want to show a client? Deploying it to a paid hosting service might be a lot of trouble. In this article, I'm going to show you how to easily deploy your Laravel projects on Heroku for free with absolutely no errors (that's the goal here).
Heroku is a platform that allows you to deploy your applications for free, supporting a variety of technologies such as PHP, JavaScript, Python, and so on. It's a great service for hosting your application , and it's used by developers all over the world.
Part 1: Setting up your Laravel project
1) Install php, composer and node, if you don't have it already
2) Go to your command line and create a new laravel project. In this example, my project is called "aisha-laravel" (sounds funny right? lol)
composer create-project laravel/laravel aisha-laravel
Once the app has been successfully created, go into the directory with the following command
cd aisha-laravel
Run your Laravel project.
php artisan serve
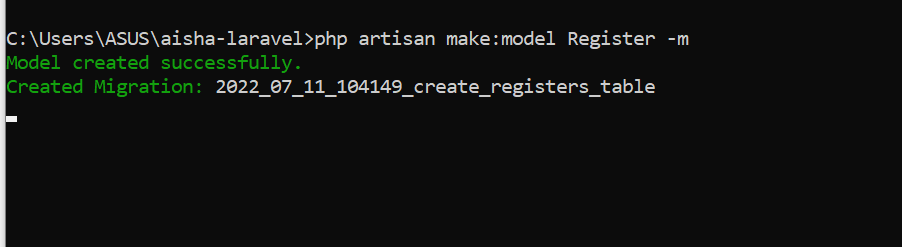
3) Now lets create models, migrations, seeders, and controllers for our database. We can make a model and the associated migration table with a single command.
php artisan make:model Register -m
You should see something similar to what is displayed on the image
Edit your migrations table by adding the fields shown below
<?php

use Illuminate\Database\Migrations\Migration;
use Illuminate\Database\Schema\Blueprint;
use Illuminate\Support\Facades\Schema;

return new class extends Migration
{
    /**
     * Run the migrations.
     *
     * @return void
     */
    public function up()
    {
        Schema::create('registeredUsers', function (Blueprint $table) {
            $table->id();
            $table->string('firstName');
            $table->string('lastName');
            $table->string('phoneNumber')->unique();
            $table->text('email')->unique();
            $table->timestamps();
        });
    }

    /**
     * Reverse the migrations.
     *
     * @return void
     */
    public function down()
    {
        Schema::dropIfExists('registeredUsers');
    }
};
Modify your Register model class and add the following
<?php

namespace App\Models;

use Illuminate\Database\Eloquent\Factories\HasFactory;
use Illuminate\Database\Eloquent\Model;

class Register extends Model
{
    use HasFactory;
    protected $table = "registeredUsers";
    protected $fillable = [
        'firstName',
        'lastName',
        'phoneNumber',
        'email',

    ];
}
Create a seeder class by running the following command
php artisan make:seeder RegisterSeeder
Modify your newly created seeder class (RegisterSeeder) and add the following
<?php

namespace Database\Seeders;

use Illuminate\Database\Console\Seeds\WithoutModelEvents;
use Illuminate\Database\Seeder;
use App\Models\Register;

class RegisterSeeder extends Seeder
{
    /**
     * Run the database seeds.
     *
     * @return void
     */
    public function run()
    {
        //This helps us reset the table everytime the function is called
        Register::truncate();
        Register::create([
            'firstName' => 'Aisha',
            'lastName' => 'Bukar',
            'phoneNumber' => '08044884483',
            'email' => 'muhammedaisha84@gmail.com'
        ]);
        Register::create([
            'firstName' => 'Lilly',
            'lastName' => 'White',
            'phoneNumber' => '08023456789',
            'email' => 'lillywhite@gmail.com'
        ]);
    }
}
Also, update the default DatabaseSeeder class by adding the following line of code to the run function
<?php

namespace Database\Seeders;

use Illuminate\Database\Console\Seeds\WithoutModelEvents;
use Illuminate\Database\Seeder;

class DatabaseSeeder extends Seeder
{
    /**
     * Seed the application's database.
     *
     * @return void
     */
    public function run()
    {
        $this->call(RegisterSeeder::class);
        // \App\Models\User::factory(10)->create();

        // \App\Models\User::factory()->create([
        //     'name' => 'Test User',
        //     'email' => 'test@example.com',
        // ]);
    }
}
Create a new controller with the following command
php artisan make:controller AuthController
Modify the newly created AuthController file
<?php

namespace App\Http\Controllers;

use Illuminate\Http\Request;
use App\Models\Register;

class AuthController extends Controller
{
    public function index(){
        $registeredUsers = Register::get()->toJson(JSON_PRETTY_PRINT);
        return response($registeredUsers, 200);
    }
    public function show($id=null){

        $registers = Register::find($id);
        if( $registers){
            $registers =  $registers->toJson(JSON_PRETTY_PRINT);
         return response( $registers, 200);
        }
        else{
            return response()->json([
                "message" => "User not found",
              ], 404);
        }
    }
}
4) Let us also modify our api.php file under the routes folder
<?php

use Illuminate\Http\Request;
use Illuminate\Support\Facades\Route;
use App\Http\Controllers\AuthController;

/*
|--------------------------------------------------------------------------
| API Routes
|--------------------------------------------------------------------------
|
| Here is where you can register API routes for your application. These
| routes are loaded by the RouteServiceProvider within a group which
| is assigned the "api" middleware group. Enjoy building your API!
|
*/

// Route::middleware('auth:sanctum')->get('/user', function (Request $request) {
//     return $request->user();
// });

Route::get('/register', [AuthController::class, 'index']);

Route::get('/register/{id}', [AuthController::class, 'show'])->name('show.register');
5) Create a file named "Procfile" (with a capital letter P) in the root of your projects directory
Please note that this file must be in the root of your projects directory and not under any other subdirectories for it to work.
Part 2: Add your project to Github
1) Sign into your Github account
2) In your command line, run the following to initialize your project as a Git repository (make sure you are in the root of your projects directory)
git init -b main
3) Stage your files
git add .
4) Commit your files
git commit -m "first commit"
5) To create a repository for your project on Github, sign into your Github, go to repository, click on "New" and create a repository. Copy your remote (HTTPS) URL for your repository
6) Go back to your command line and add the following
git remote add origin <REMOTE_URL>
You can verify the new remote URL by running the command
git remote -v
7) It is time to push the changes from your local repository to Github by running the command
git push origin main
Part 3: Deploying your Laravel project on Heroku
1) Login into your Heroku account
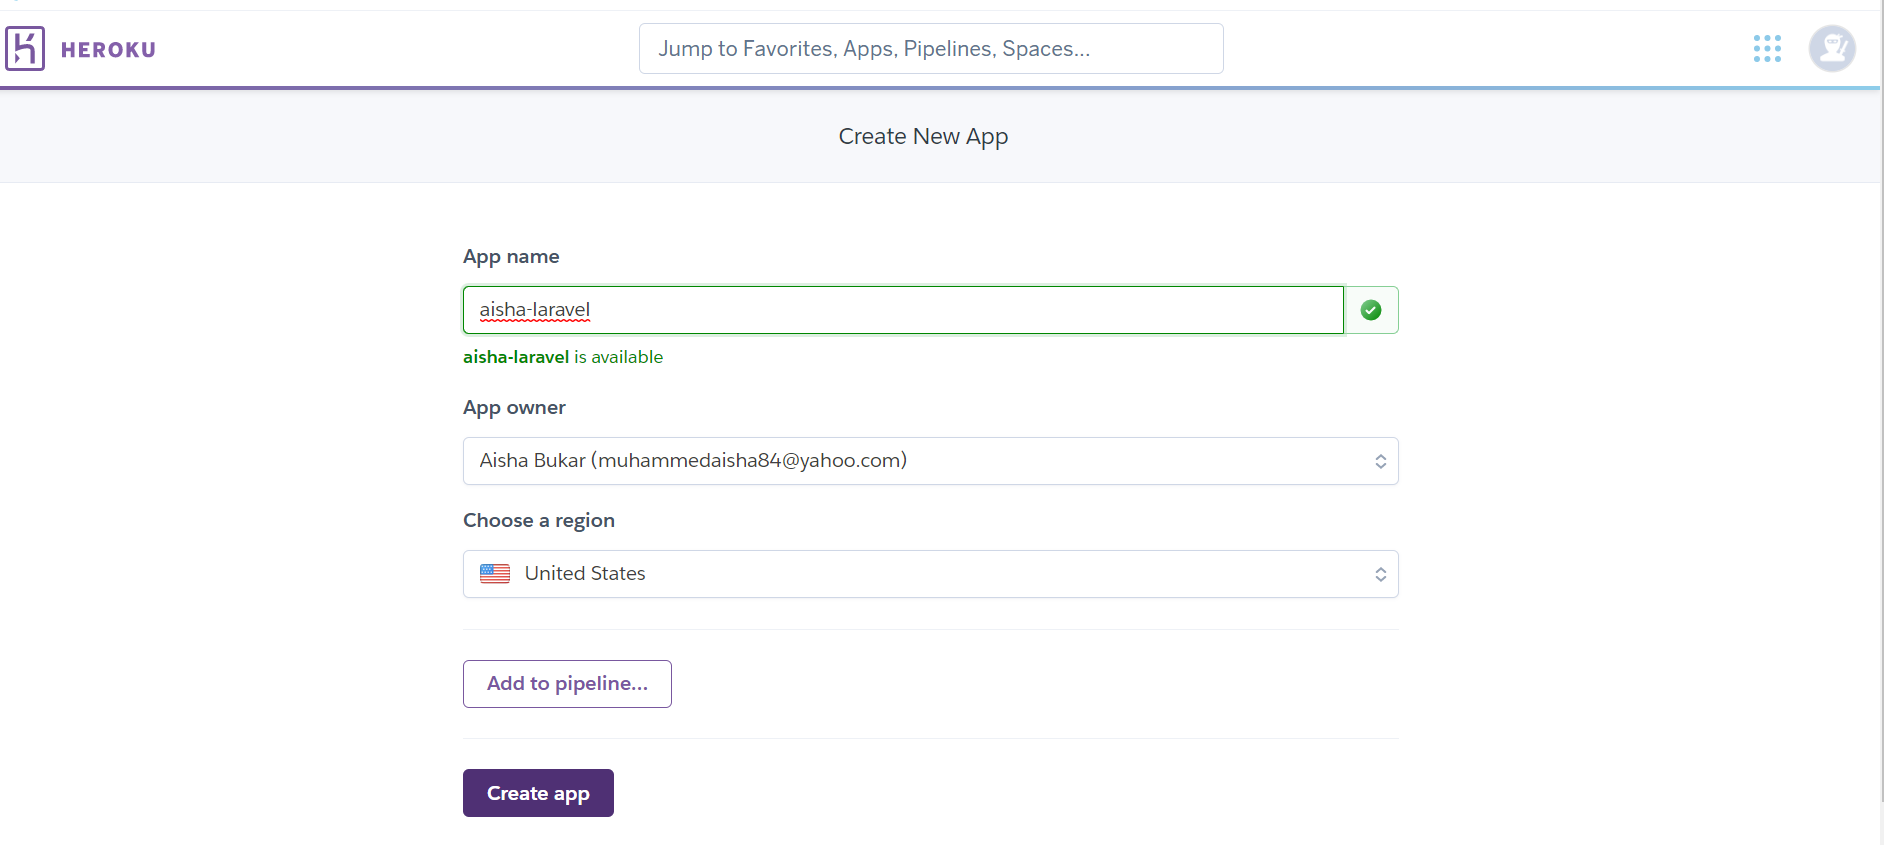
2) On your toolbar at the top of your screen, click on New then Create new app, choose an app name of your choice and create it.
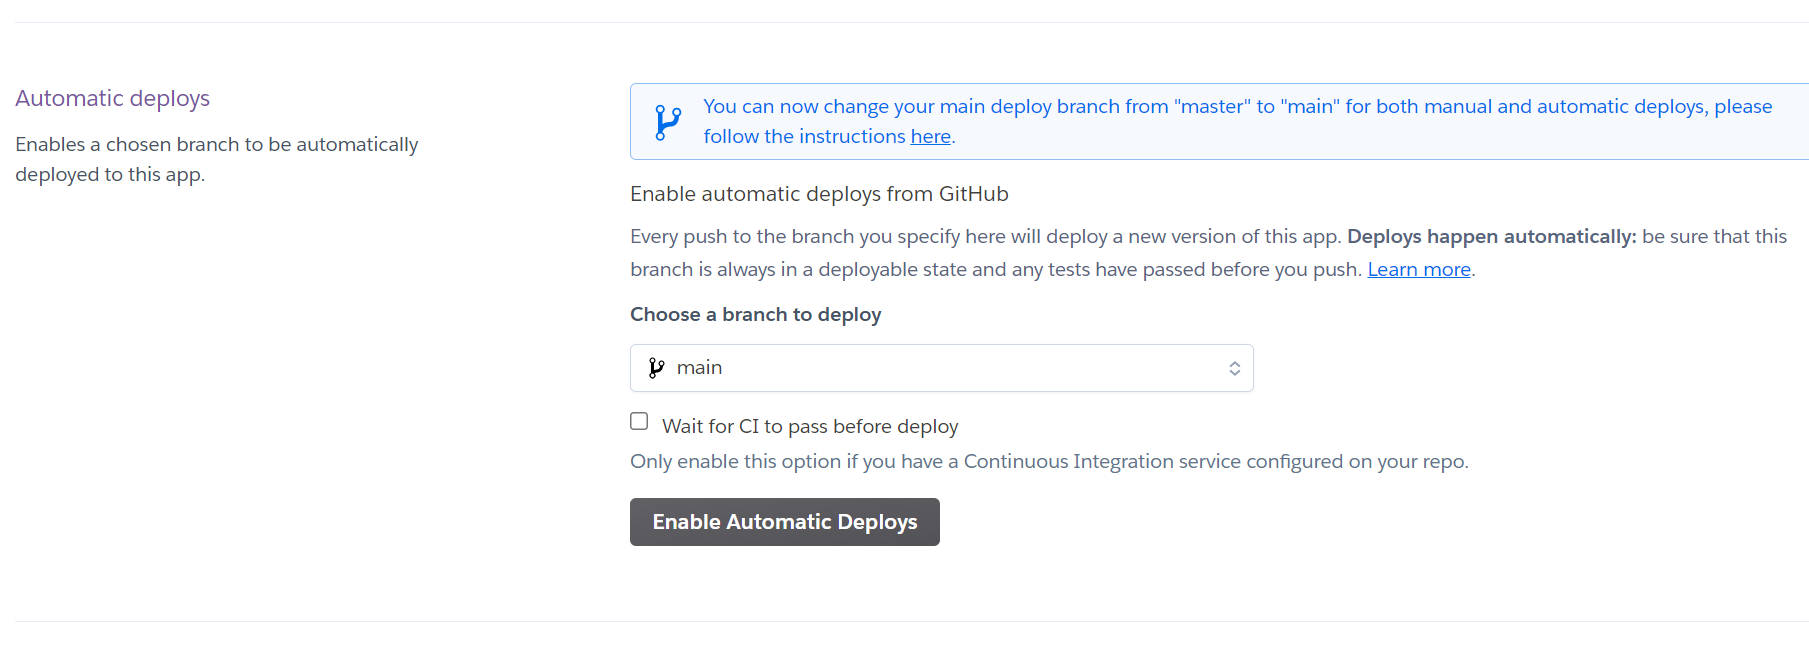
3) We'll be deploying our app by connecting directly to Github. Fill in your Github repo name and connect it, as shown in the image below.

Let's also enable automatic deploys so that whenever we push to Github, the changes are automatically deployed.
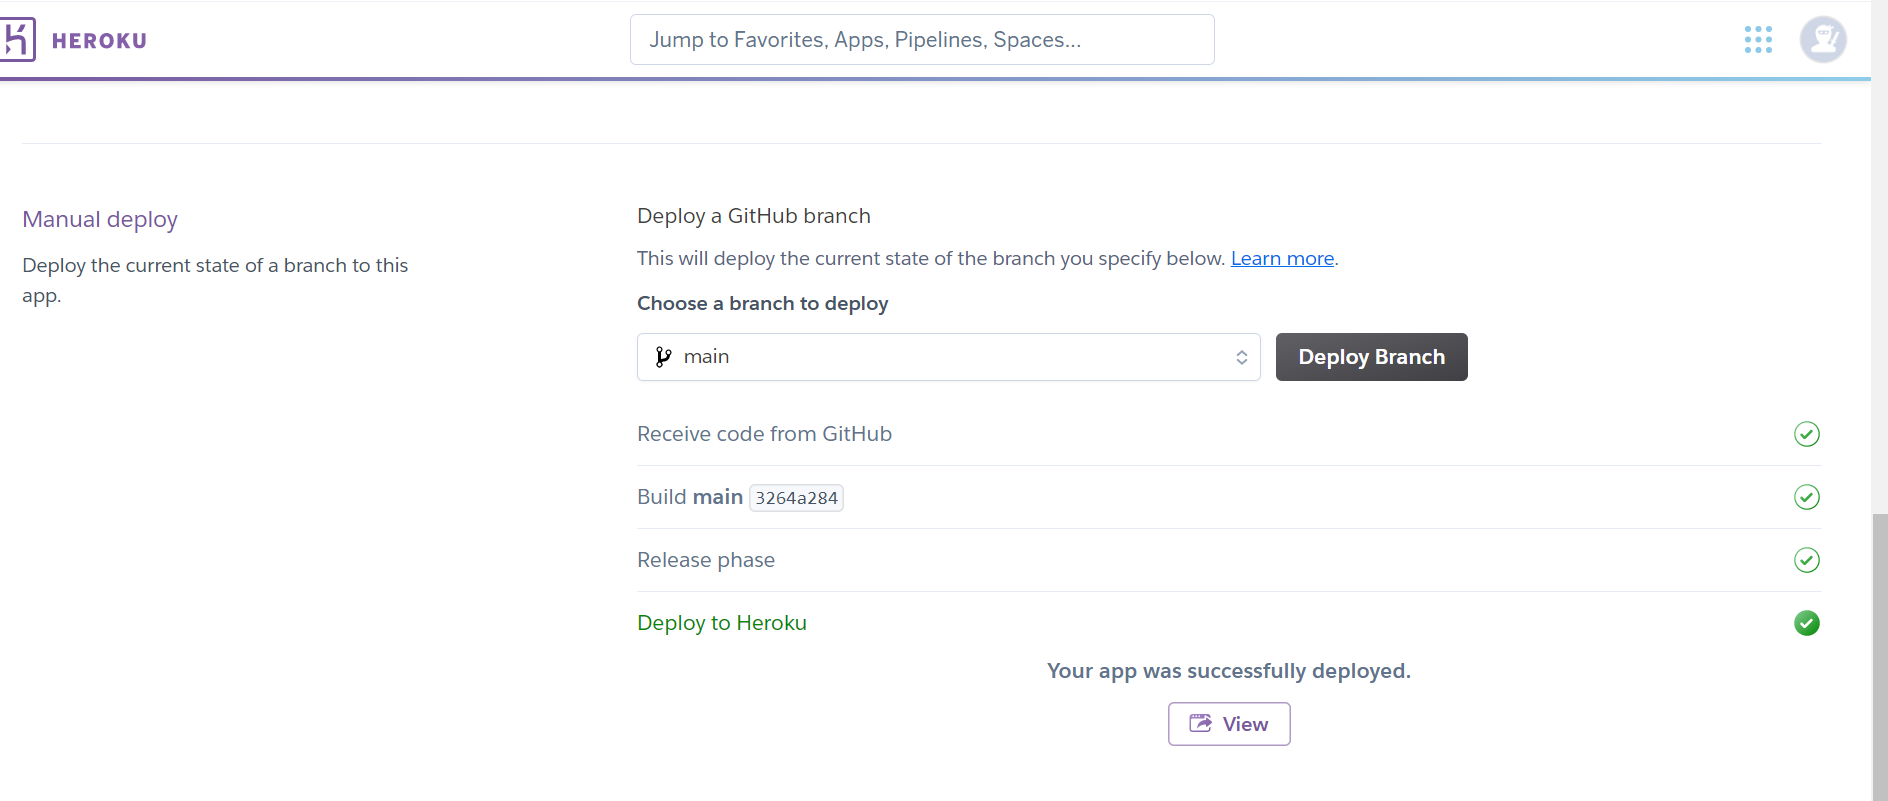
4) Let us manually deploy our branch so that we can view our app and obtain its URL.
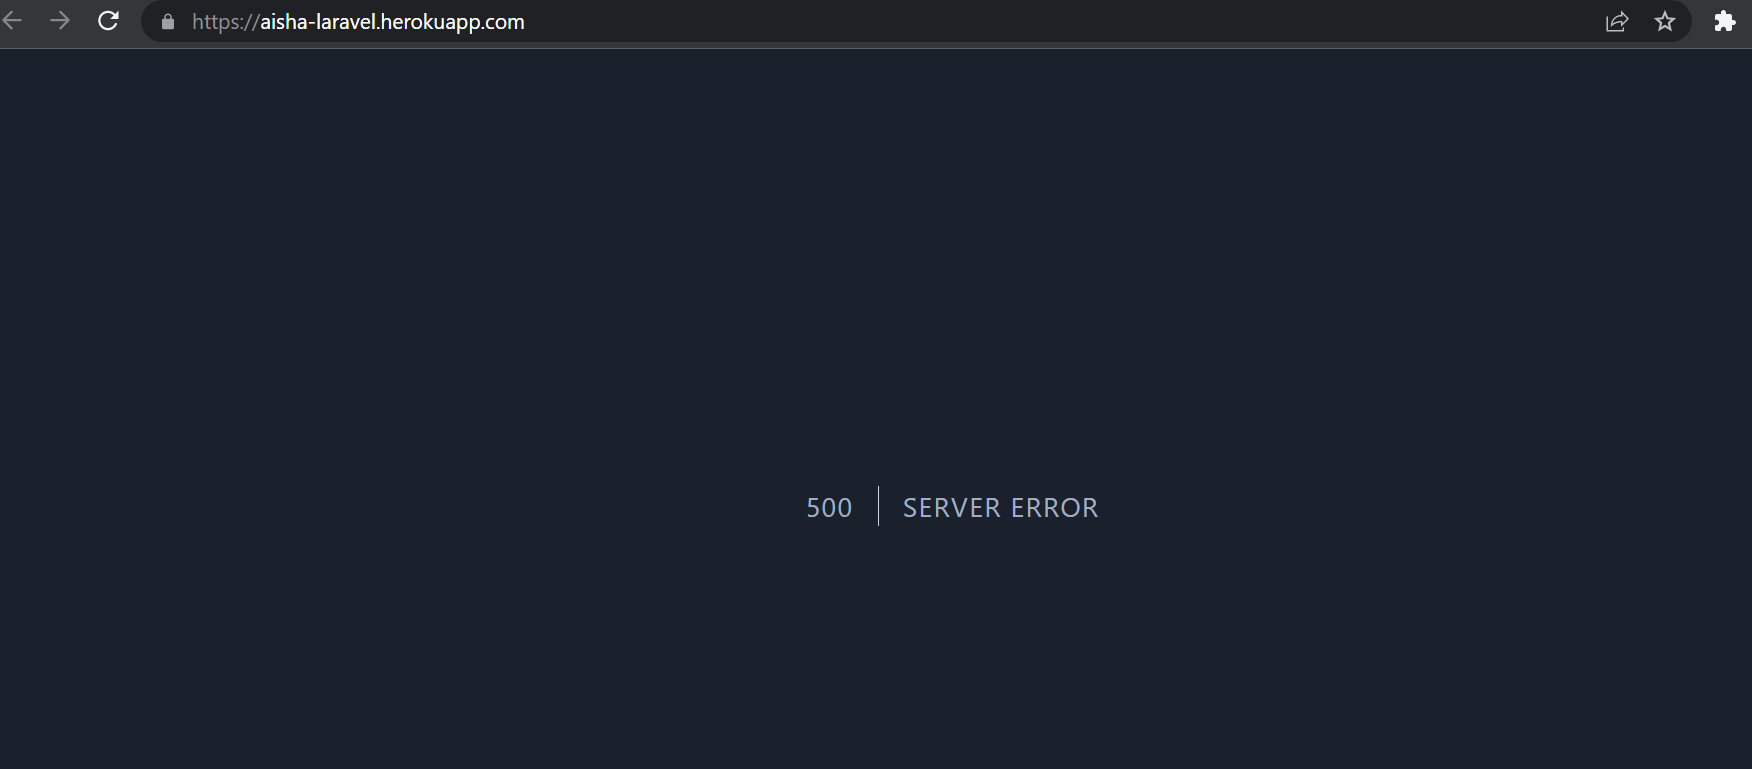
When we view our app, you may receive a 500 server error, as shown in the image below, but that is fine for now.
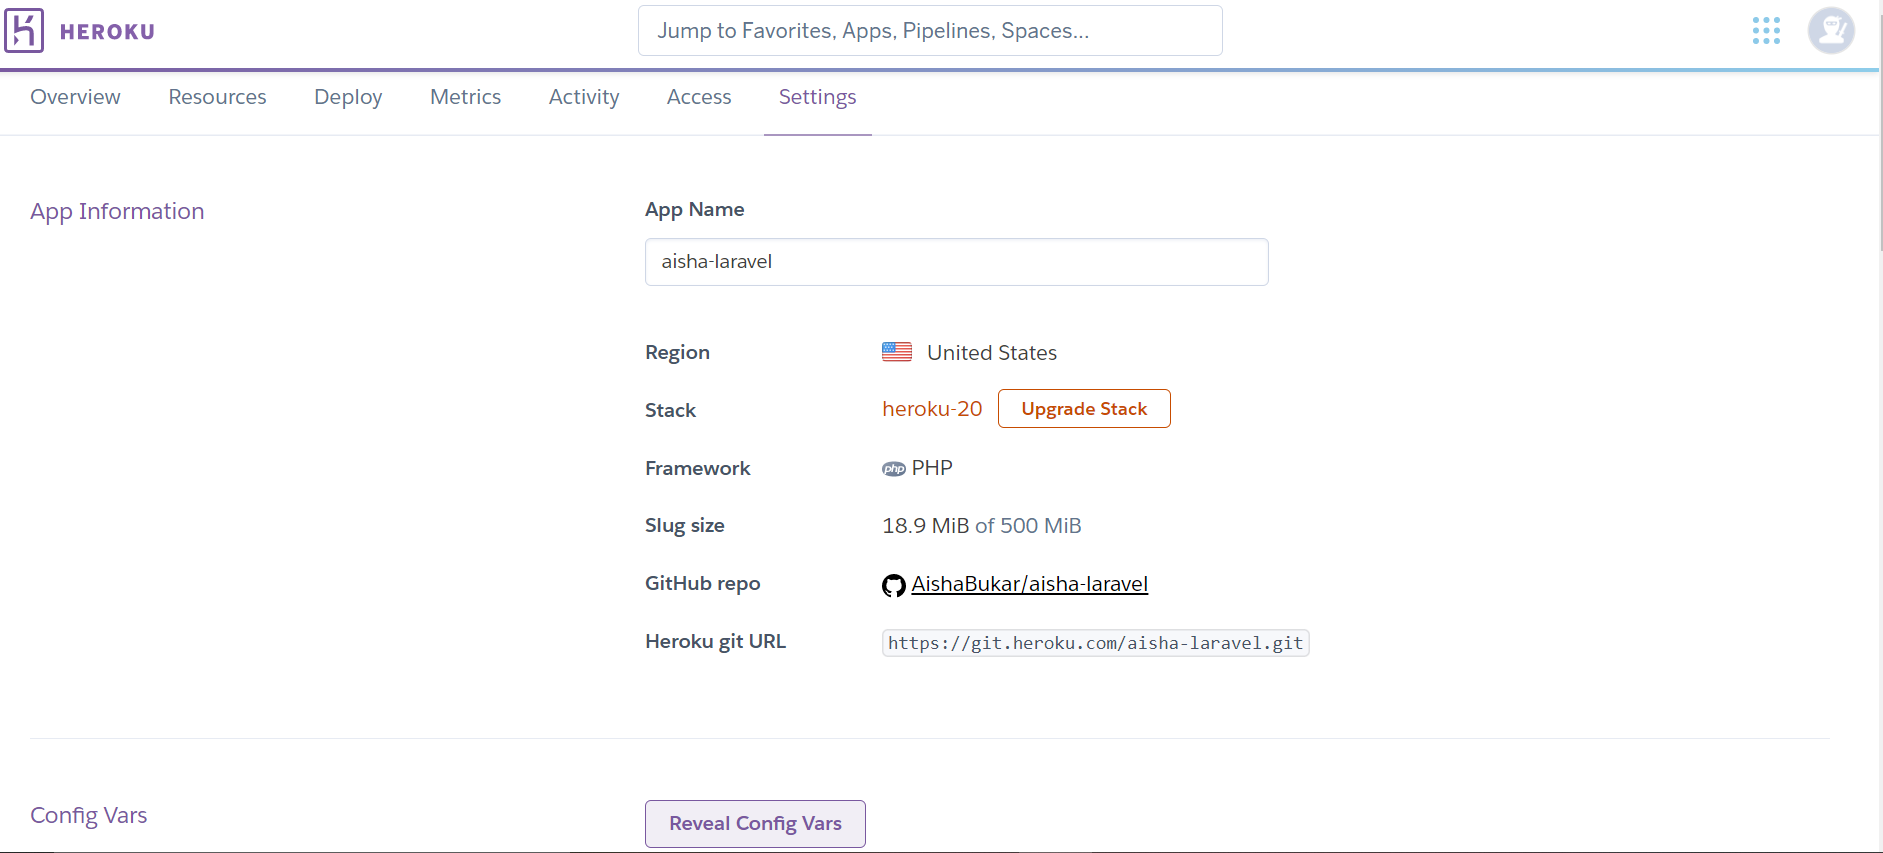
4) Go to settings at the top of your newly created apps page and select Reveal Config Vars.
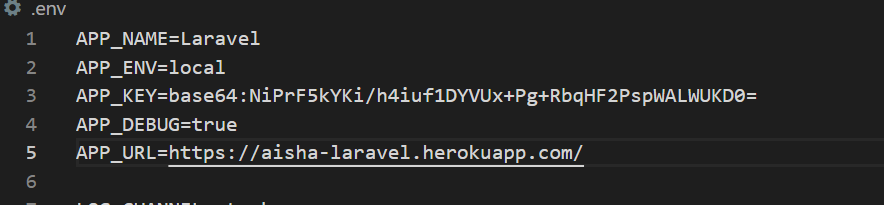
We would need to add some information from our laravel project's .env file to our Heroku app. I already replaced my APP_URL from http://localhost to my app's URL in my .env file
Fill in the pieces of information in the Config vars
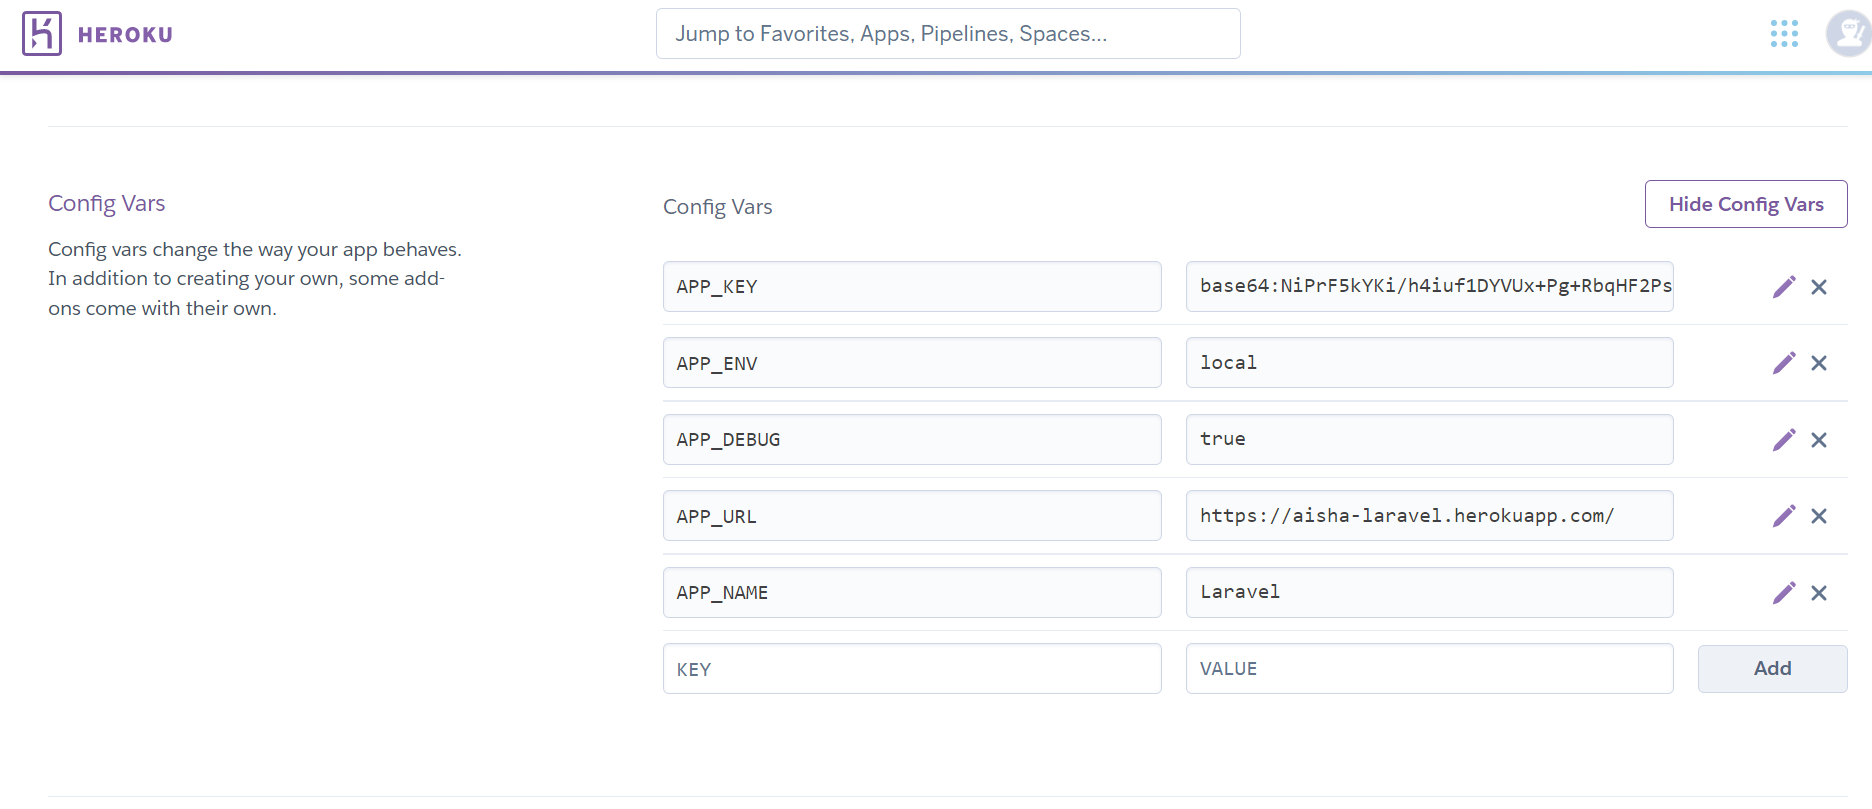
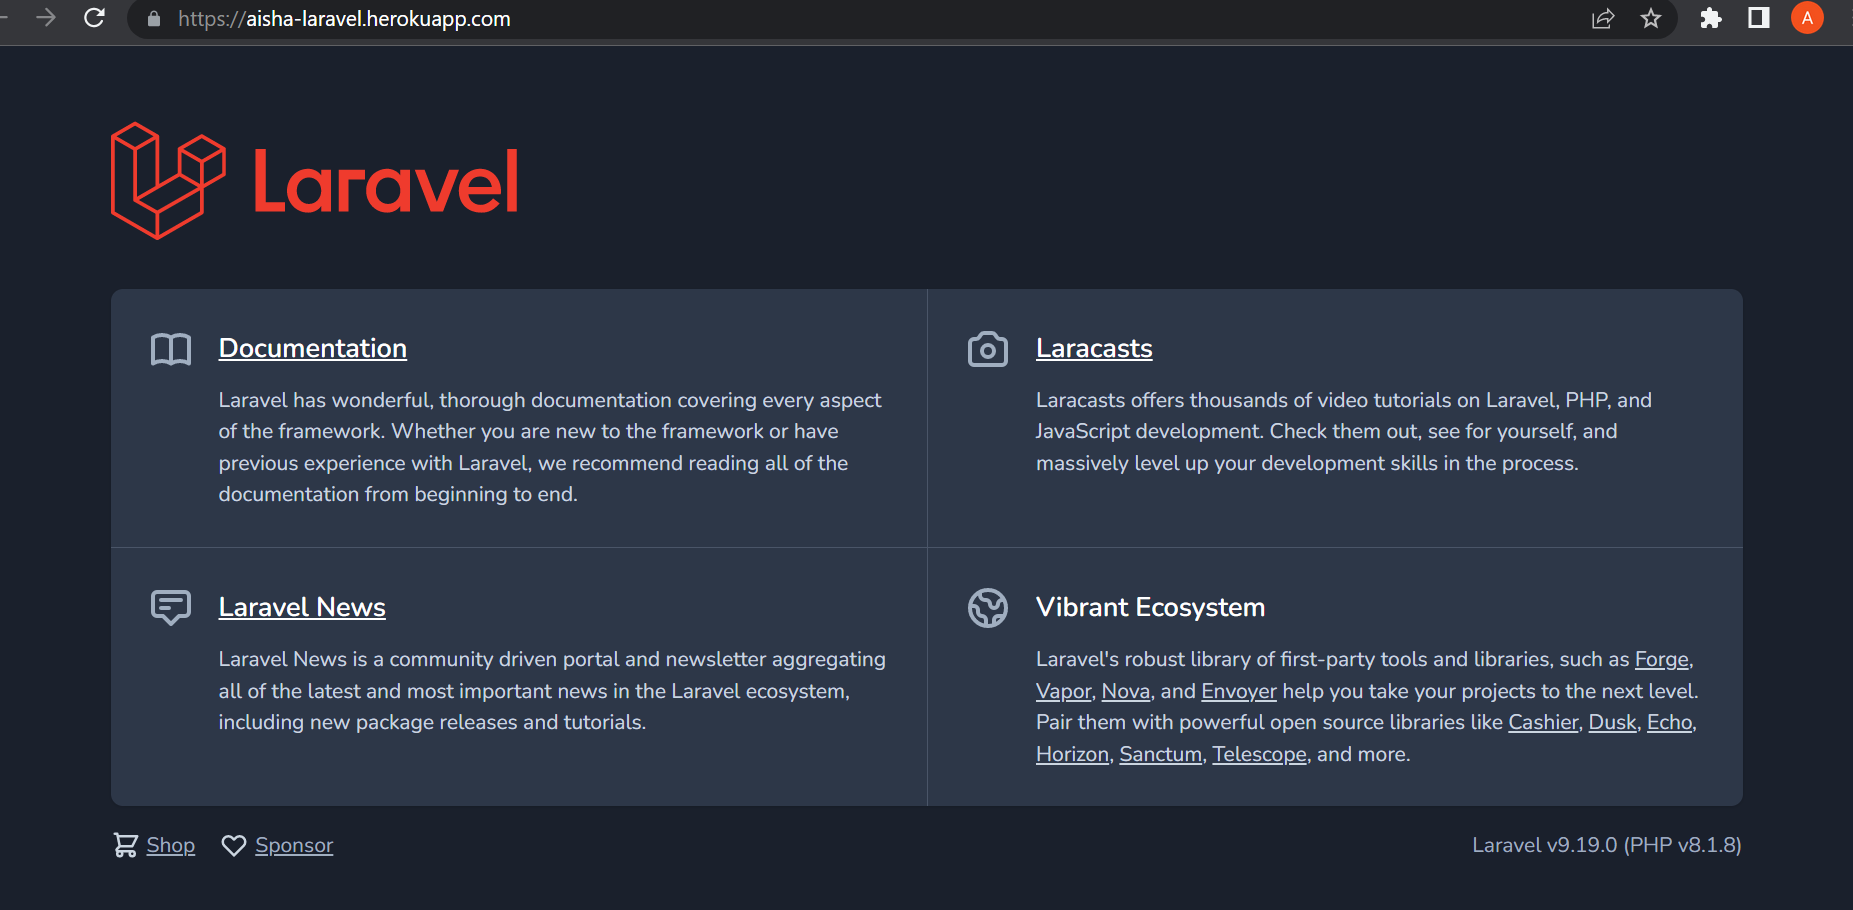
Return to your app and refresh it. Your Laravel app should now be up and running. Congratulations!
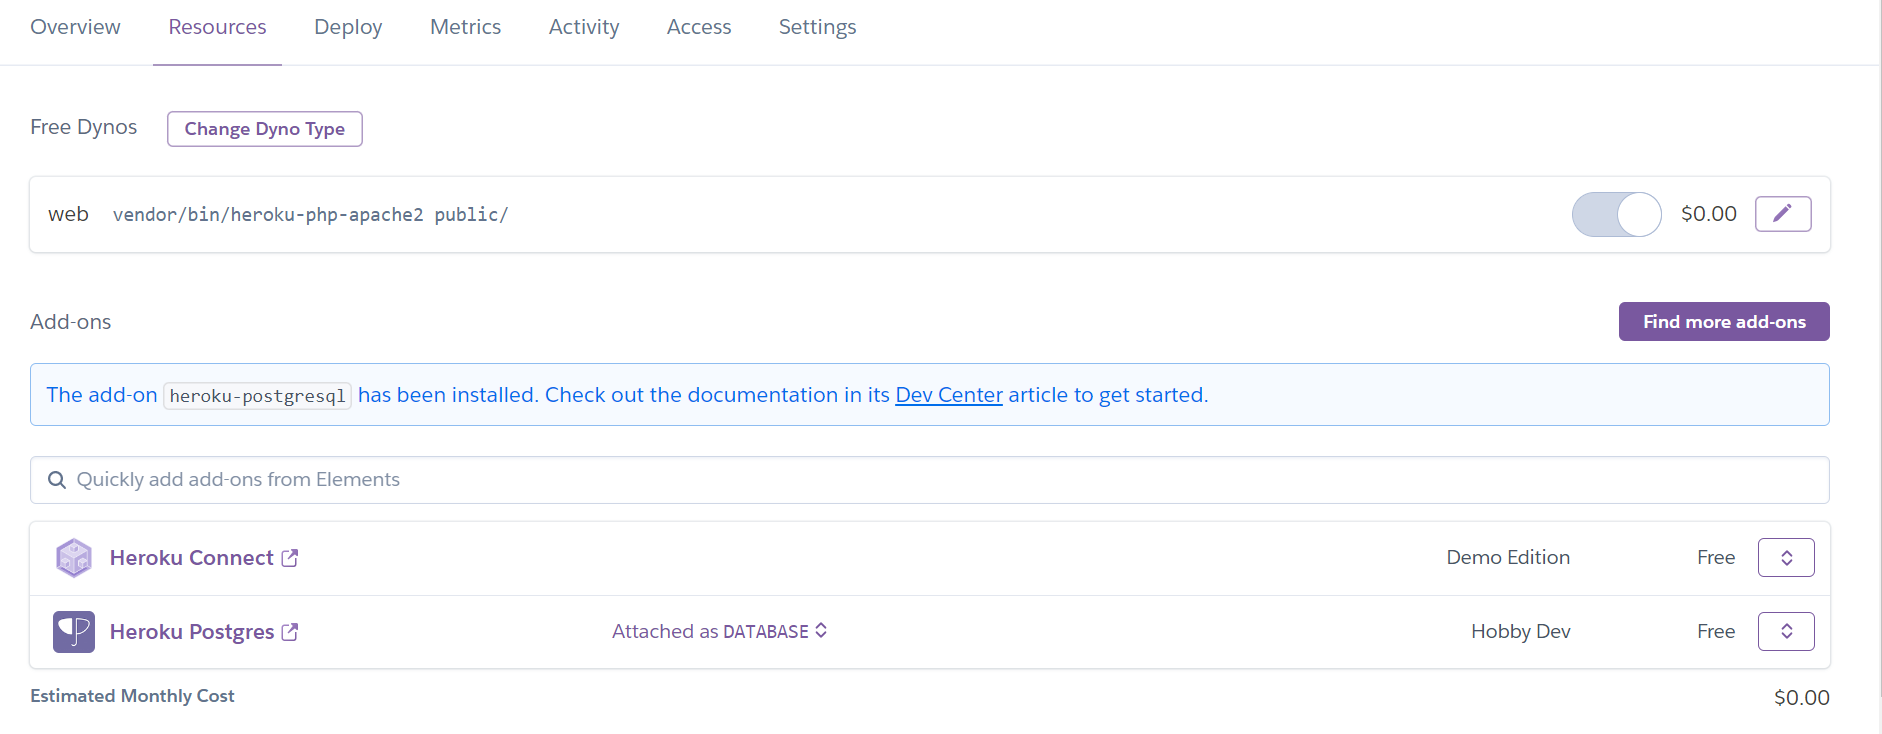
5) Return to your Heroku app and click on Resources at the top of the page. Go to add-ons and search for "Heroku Connect", and submit the order form.
A database would also be required. Heroku Postgres is the preferred relational database for Heroku apps due to its close integration with the platform. So, we would also need to search for "Heroku Postgres", submit an order form, and add it to our add-ons.
Your add-ons should look like this
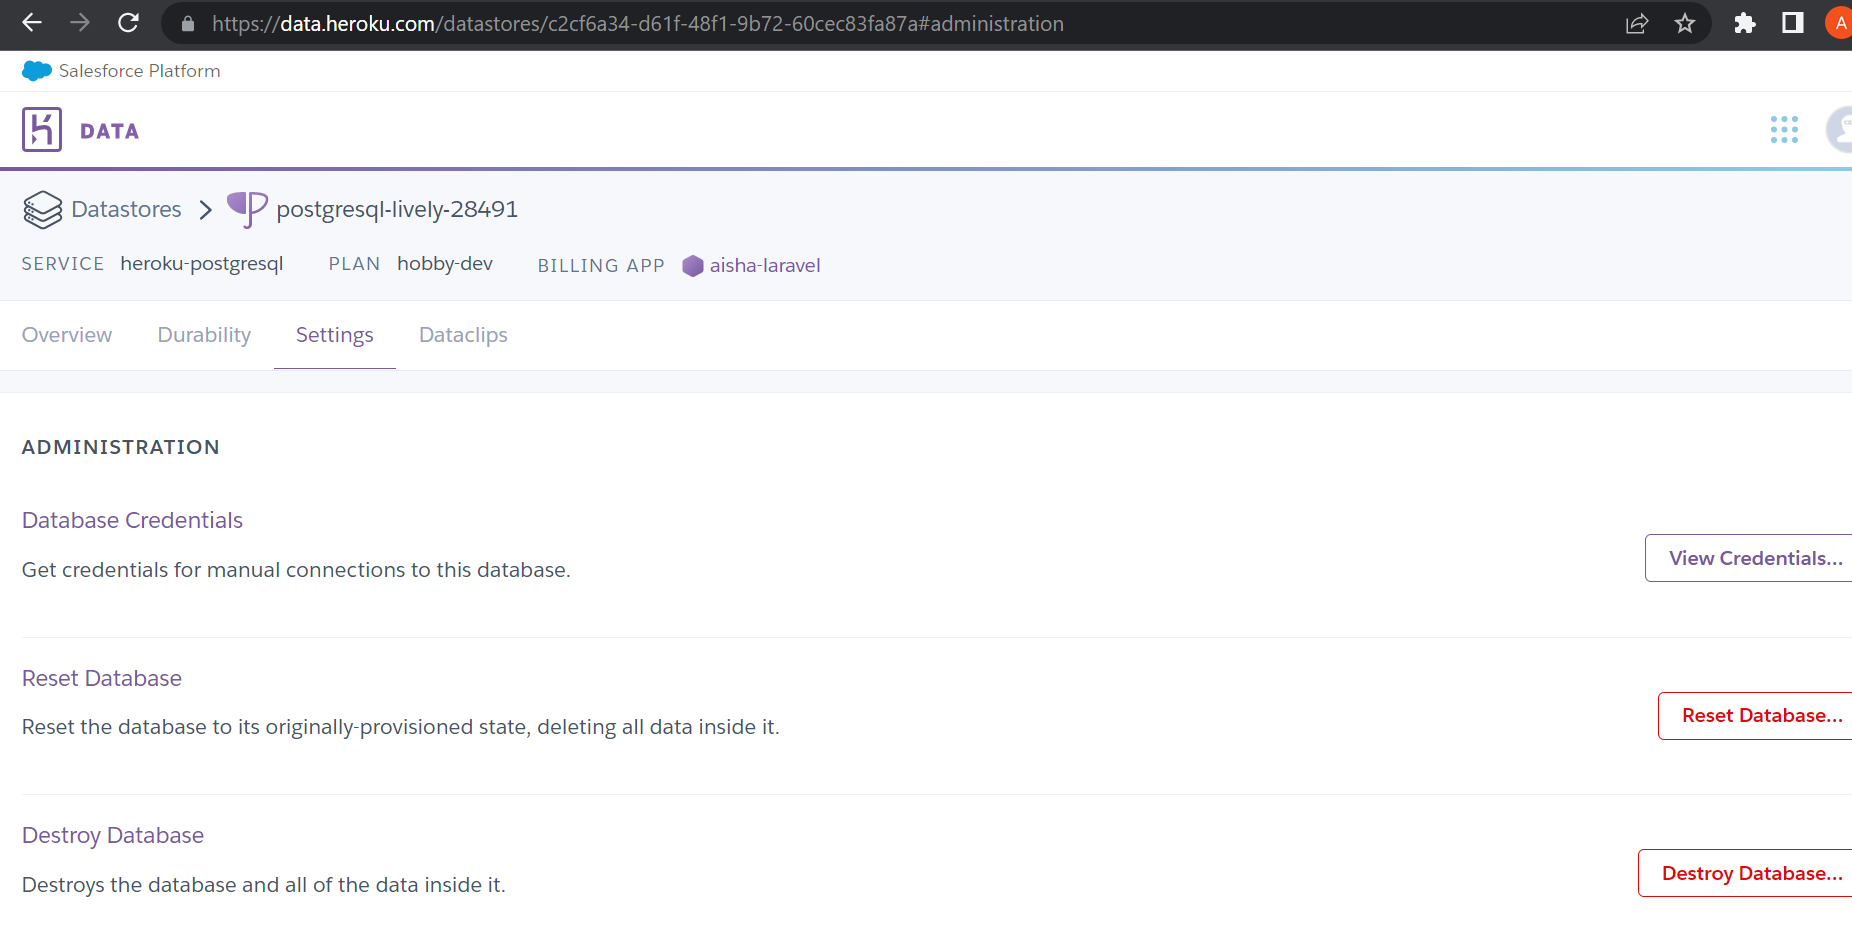
6) Click on "Heroku Postgres" so we can get our database information. Go to settings at the top of the page and click on view credentials. You should see all the database information required.
Fill this information in your .env file which is located in your laravel project. This is an example of how your DB connection should look like.
DB_CONNECTION=pgsql
DB_HOST=ec2-34-233-115-14.compute-1.amazonaws.com
DB_PORT=5432
DB_DATABASE=d457uc2b1o3hc
DB_USERNAME=dabhvdhteqcdfu
DB_PASSWORD=b990a02e5153b133ae703981fbefde49cd1f0f17916e3ba6064ed717094055e8
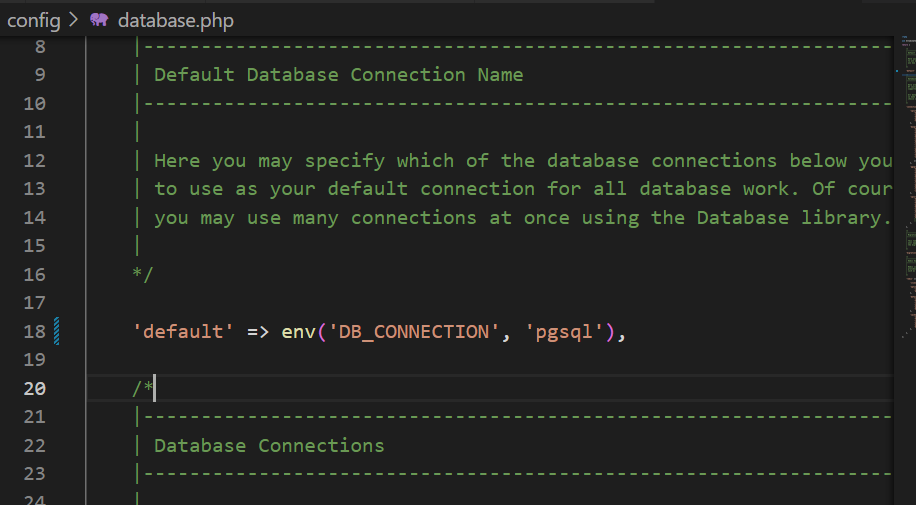
Also, change the default database from mysql to pgsql in your database.php file which is inside the config folder
7) Install Heroku cli
To verify your installation, run the following command
heroku --version
8) After installation, login to your heroku account from the cli
heroku login
9) To access our app, run the following command
heroku access --app your_app_name

//In my case, my app is named aisha-laravel

heroku access --app aisha-laravel
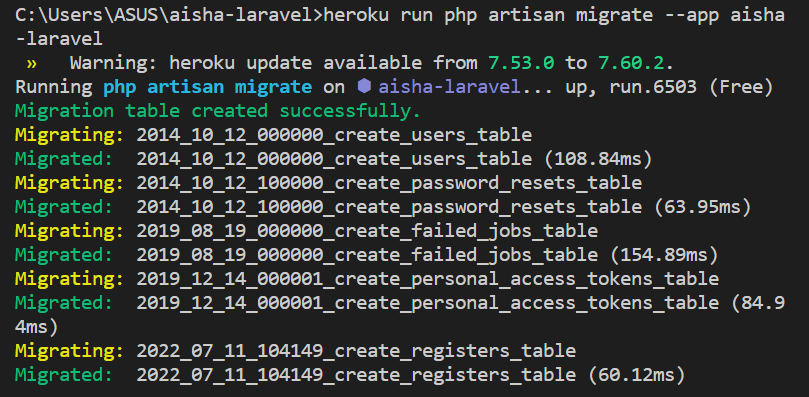
10) Finally, we can run our migrations with the following command
heroku run php artisan migrate --app your_app_name
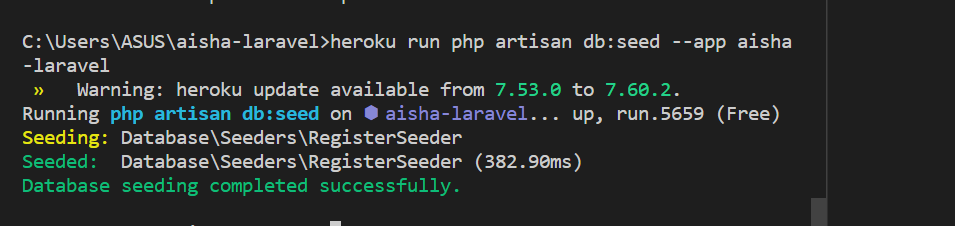
11) Let us also run our seeders with the following command
heroku run php artisan db:seed --app your_app_name
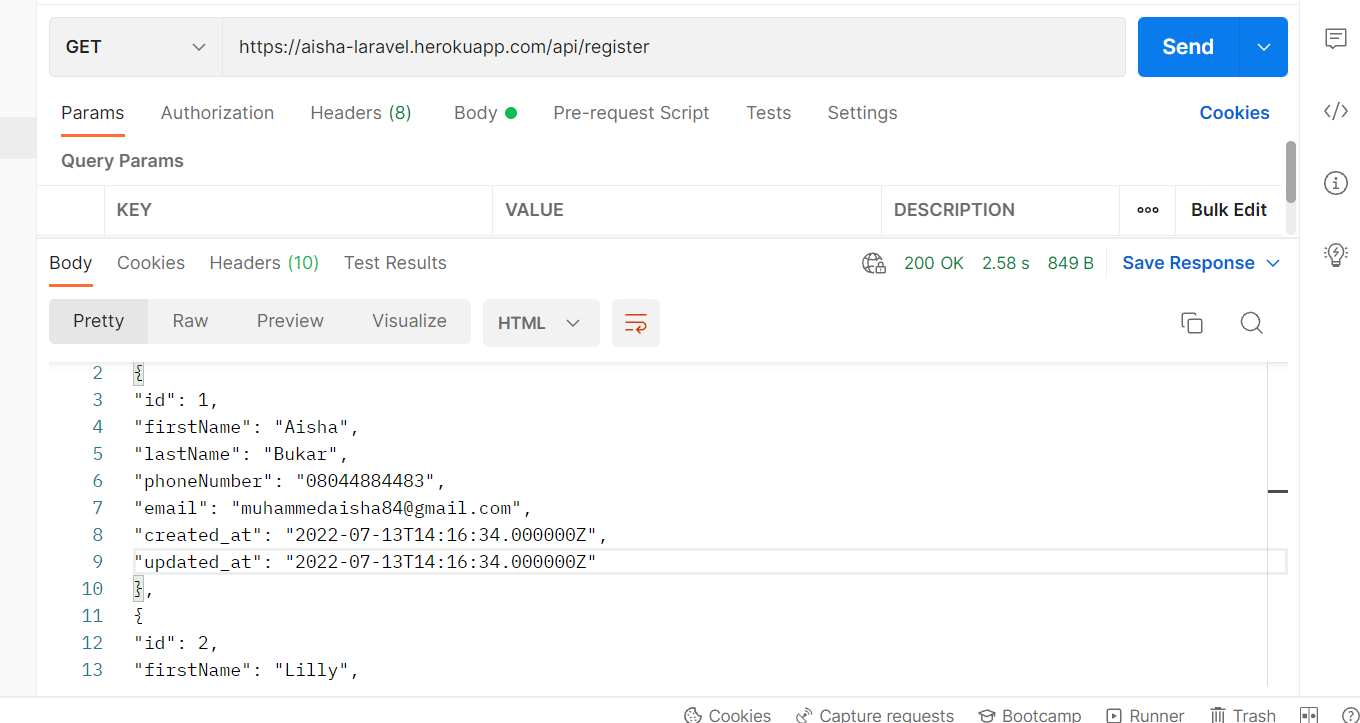
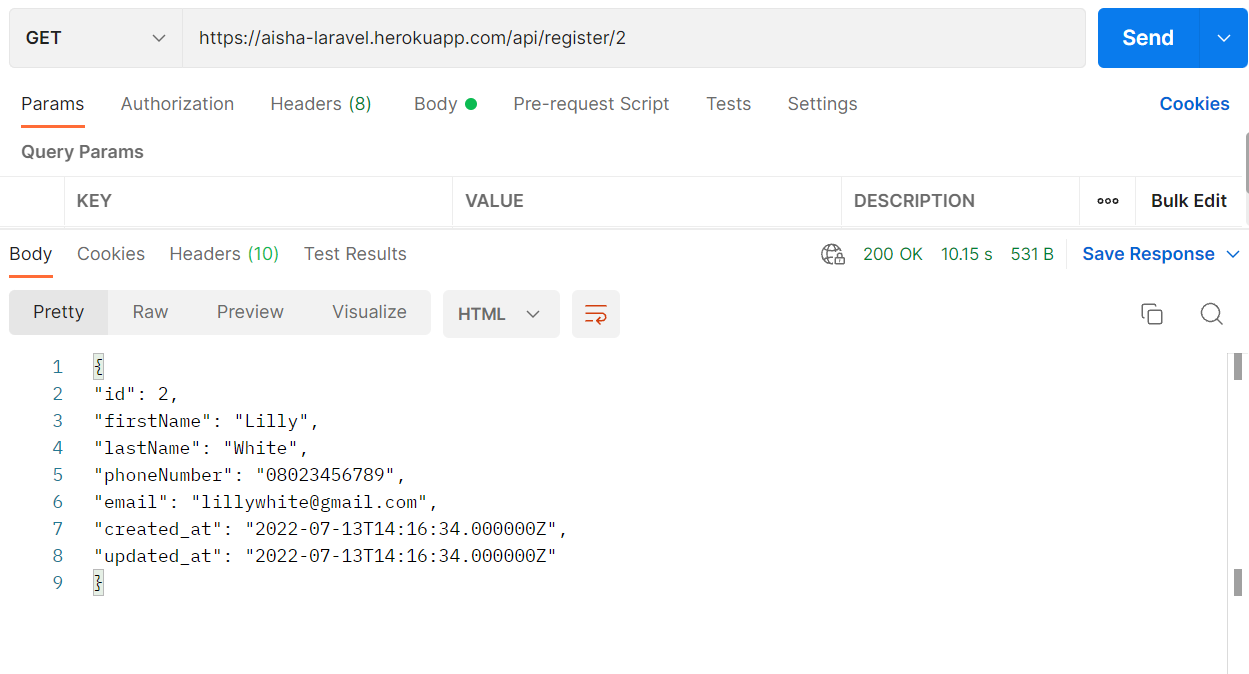
We can test our api on Postman to be sure everything works fine.
If you've made it this far, congratulations! Please let me know if this article helped you successfully deploy your project, and if you get stuck somewhere, I'd be happy to assist. Thank you for sticking with me this far. Bye for now!


